© 2020 Mark Cramer
Thousands of central Florida homeowners are facing a stucco disaster. Cracking stucco, water entry and resulting rotting of wood frame structures has become a nightmare for homeowners and home builders. One national builder has set aside more than 40 million dollars to repair improperly installed stucco. In most cases, the structural damage is concealed and can’t be discovered without destructive inspection.
During the 2005-10 construction boom, shoddy workmanship, lack of supervision, combined with lax or no inspections resulted in a perfect storm of stucco disasters resulting in billions of dollars in damage.
Stucco takes time. It’s very time consuming to properly install backing and accessories. Production builders live by the cheaper is better model. Anything that takes time tends to go by the wayside in the world of production building where a 2 story home is built in 30 days.
In the past few years, I’ve conducted more than 200 destructive inspections of improperly installed stucco on Central Florida homes for homeowners making construction defect claims. I’ve learned every possible way you can improperly install stucco you can imagine, and some that you or I couldn’t imagine.
As home inspectors, we face a dilemma. Most of these defects can’t be discovered or proven until you break things apart. Many of them, however, can be seen without performing destructive inspection. As consumers become aware of stucco issues, their expectations about what a home inspector tell them about stucco increase.
In this article, I’ll share some of the points you can observe in the course of a visual home inspection that will help you and your clients avoid an expensive problem. Fixing these problems isn’t cheap. Removal and replacement costs can range upwards of $50,000.00 dollars.
Lack of Drainage
All vertical panels of stucco have to drain water at the bottom. In central Florida, the typical production home is concrete block on the first floor and wood frame on the second floor. You need to see a weep screed at the bottom of all wood frame walls above a masonry wall or foundation. This has long been required in the ASTM standards that are referenced in the model building codes. In 2005, the Florida Building Code added a specific requirement for drainage at this point. I’ve seen many homes without this drainage or with it improperly installed.
Reference:
ASTM C-1063: 7.11.5 Foundation Weep Screed—Foundation weep screed shall be installed at the bottom of all steel or wood framed exterior walls to receive lath and plaster.


No Drainage at Horizontal Returns
Anywhere vertical stucco surfaces meet horizontal surfaces, drainage is required. All wood frame walls must drain water at the bottom. This is easy for home inspectors to see.
Drainage is specifically required here by the ASTM standards referenced in the building code. Any water that enters here is trapped as it can’t drain out at the bottom of the vertical panel. When water entry occurs, the wood structure is damaged.
Reference:
ASTM C-926: A2.2.3 Where vertical and horizontal exterior plaster surfaces meet, both surfaces shall be terminated with casing beads with the vertical surface extending at least 1⁄4in. (6 mm) below the intersecting horizontal plastered surface, thus providing a drip edge. The casing bead for the horizontal surface shall be terminated not less than 1⁄4 in. from the back of the vertical surface to provide drainage.


Here’s what the structure looked like after the stucco was removed.
If you can see stains bleeding out, it’s very likely there’s heavy damage.


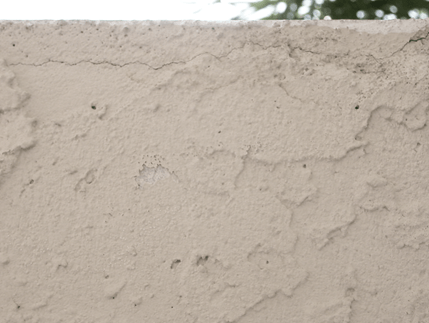
Stucco That’s Too Thin
ASTM standards require that stucco on wood backing be 7/8 of an inch thick, exclusive of texture. Stucco that’s too thin isn’t as strong and is more likely to crack. Cracks admit water. The wire lath rusts and expands, allowing more water entry and causing more cracking. Often these cracks on a second story wall are too small to see from the ground.
You can often get an idea of the thickness by looking at the dimensions of casing beads or weep screeds at the bottom of walls above roofs, or by inserting a thin ruler above the top of the stucco at the soffit level.

In 7/8 inch stucco the channel would be buried in the stucco,

Improperly Installed Paper Backed Lath
It’s common to use paper backed lath over wood sheathing in Florida. The paper and lath are offset, so that the paper can be lapped over the paper and the lath can be lapped over the lath. This takes time. It’s much faster just to slap it up any which way. If paper is lapped over wire, this results in thin spots that are prone to cracking. These cracks have a distinctive shape and configuration that you can observe. If you see long horizontal cracks about two feet apart, it’s likely this is the cause.
You can’t successfully patch these cracks. In my experience, they redevelop, admit more water, causing more corrosion of lath and more cracking and damage.


If you see cracking parallel to a rake edge about 2 feet down from the top of the wall, you can be reasonably sure that’s due to running the lath at an angle at the top of the wall. as shown below.

Lath run at an angle overlapping the horizontal pieces causes cracking at the thin areas created by improper lapping.
Improperly Installed Control Joints
Control joints are installed to allow stucco to shrink initially and expand and contract. The typical W shaped joints is designed to move in an accordion fashion to accommodate the movement. Key points to installing control joints include cutting the wire lath at the joint and wire tying the joint to the stucco. It’s much faster to just staple the joint to the wall, then put wire over the top of the flange, which prevents it from moving.
Any paper backing on the lath has to be under the perforated flange of the control joint to allow the stucco to lock onto the joint. If you don’t install these joints correctly, the joint can’t move and when the stucco moves, a crack develops at the joint that admits water and causes damage. Ironically, preventing cracking is why we install the joints in the first place. Almost every control joint I see is improperly installed. If you see a vertical crack at the control joint, it’s probably installed improperly.

Separation at control joint. The crack here admits water, which causes lath to rust and expand, leading to more cracking and damage.
Lack of Casing Beads and Caulked Joints
ASTM standards required casing beads at intersections with dissimilar materials, such as windows, soffit returns, etc. This was almost never done in Central Florida during this time period.
The purpose of the casing bead is to provide a gap that can be caulked. Without the caulked joint, hairline cracks invariably develop that admit water and cause damage.
Reference:
ASTM C-1063 7.11.3 Casing Bead—Nonload-bearing members shall be isolated from load-bearing members, and all penetrating elements, with casing beads or other suitable means, to avoid transfer of structural loads, and to separate from dissimilar materials.

No casing bead and no caulked joint between windows and stucco. Note the small cracks here.
The damage in the photos that follow are all caused by this issue. This crack doesn’t look like much, but the resulting damage is impressive.


Look carefully at walls at and below windows. Stains like this indicate concealed damage.

Stained floor below window indicates concealed damage.


Caulked joints are necessary at all intersections of stucco and other materials.

Here’s what it looks like under the stucco…..


This cracking is caused by multiple issues; water entry at the kickout flashing that’s not caulked, stucco that’s too thin and improperly lapped paper backed lath.
Florida’s stucco problem is real. It’s big, and it’s getting bigger. Don’t let yourself be caught on the wrong side a lawsuit because you failed to point out potential problems and explain the implications of the problem. Always make your client aware of the potential for significant concealed damage. Recommend destructive inspection. You won’t be very popular with agents, but you’ll sleep better at night. I’ve had to defend a home inspector in a concealed damage claim over stucco. It’s not pretty.
Also understand it’s useless to recommend “further evaluation by a stucco contractor.” These are the folks who created this mess. They’re likely to say it’s all just fine and you need a little patching. That’s just kicking the can down the road.
For those of you in other parts of the country, the issues are the same, not only with stucco, but with artificial stone veneer, which is essentially nothing more than lumpy stucco. Similar disasters are widespread almost everywhere.
Ironically, older homes may fare much better with the same defects. The difference is drying potential. In days past, we didn’t air seal. Some walls have little or no insulation. Older walls are much more leaky when it comes to air infiltration, allowing drying to occur. Another difference is the use of OSB sheathing, which rots much more easily when inside a wet wall. So it’s important to know what type of wall you are looking at when evaluating stucco applications.

Destructive inspection can include drilling holes and measuring moisture with a meter, or simply breaking open the stucco to see what was done wrong underneath the surface. Both have their places.